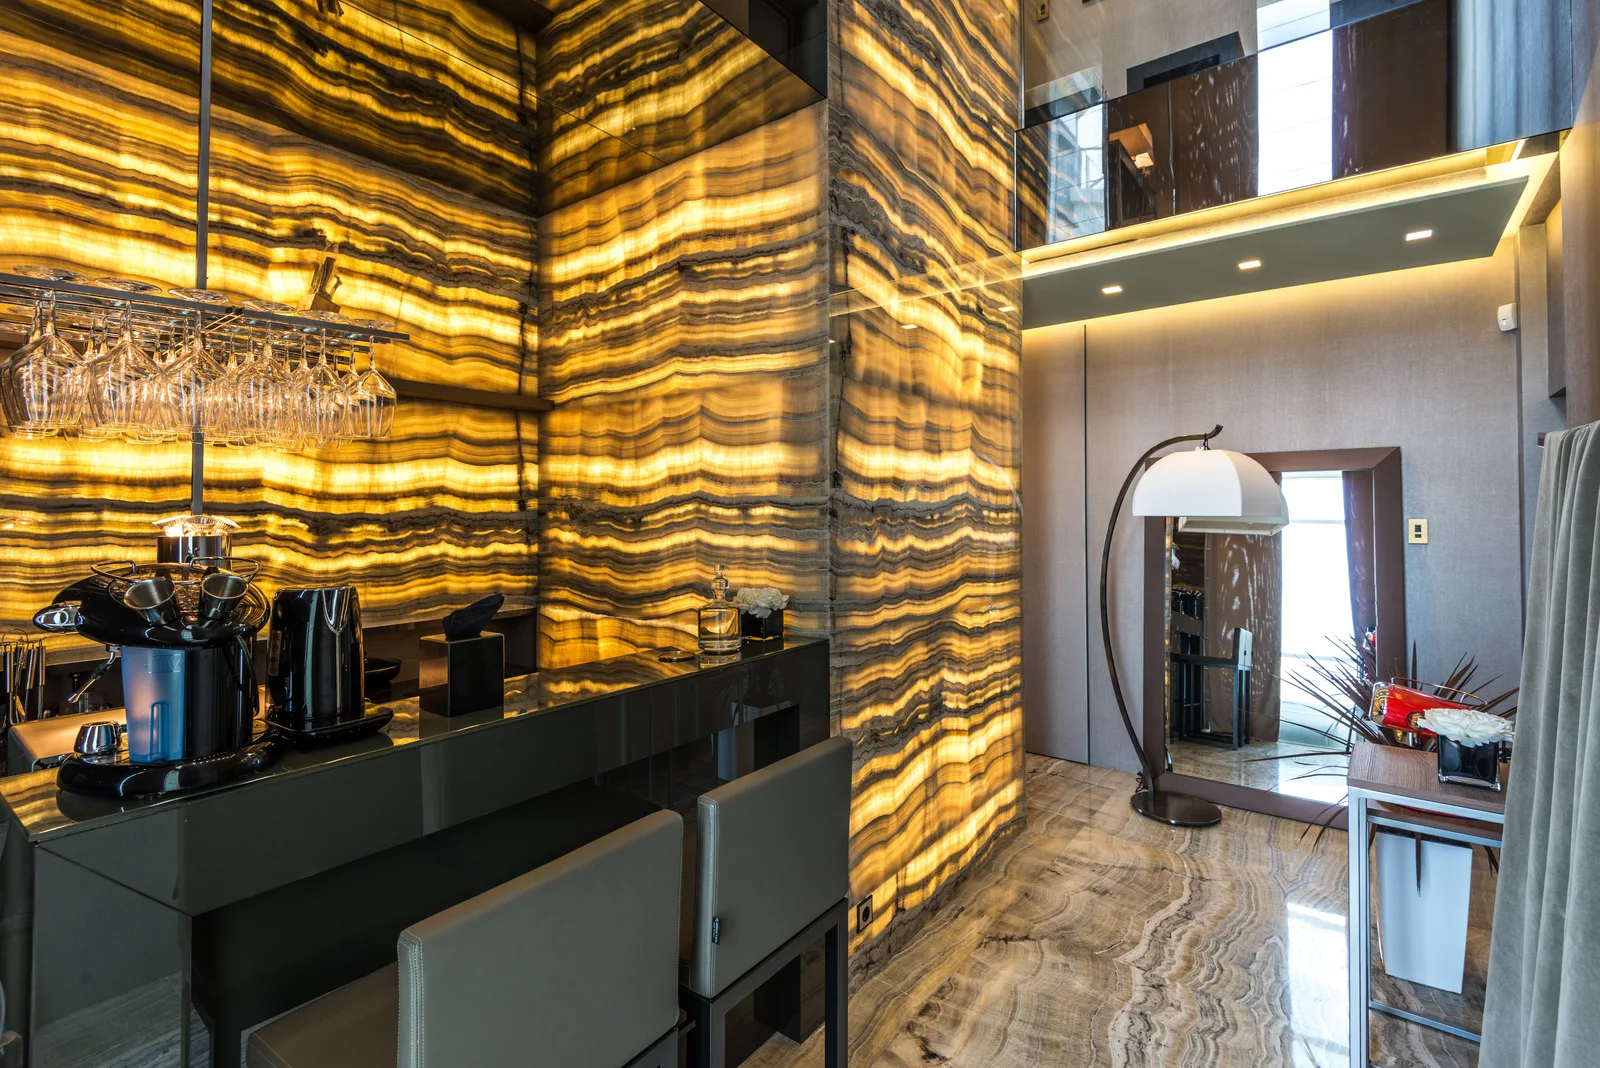

Subsurface scattering is the way light enters a translucent surface, bounces around inside it, and leaves at a different point. It is why marble glows at its edges, why a thin alabaster panel looks lit from within, and why skin never reads as plastic. Renderers simulate it with a dedicated shading model.
Architects meet the effect long before they meet the term. Anyone who has specified onyx for a reception desk, backlit stone in a hotel lobby, or a resin panel in a partition has already been designing with light that travels through material rather than bouncing off it.
Getting that behaviour right in a render is the difference between stone that looks like stone and stone that looks like printed wallpaper.
What Subsurface Scattering Actually Does
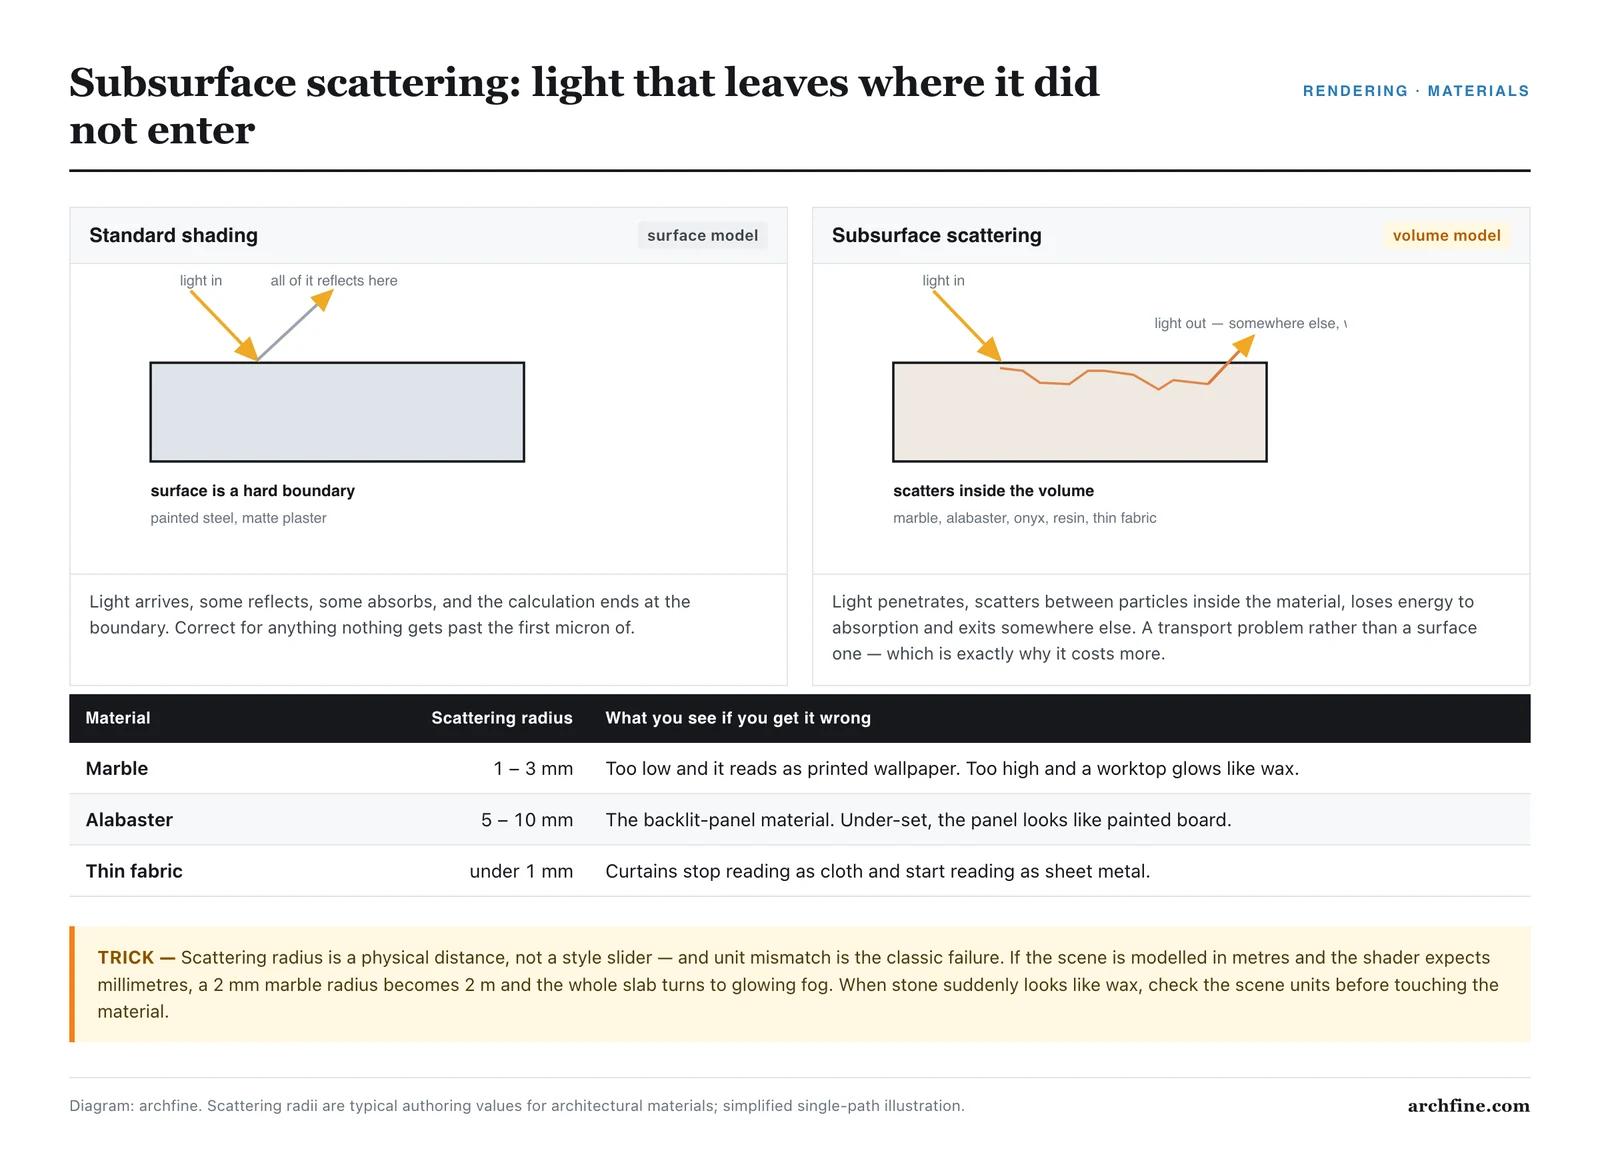
Standard shading treats a surface as a boundary. Light arrives, some reflects, some absorbs, and the calculation ends there. That model works for painted steel and matte plaster where almost nothing gets past the first micron.
Translucent materials break the assumption. Light penetrates the surface, scatters between particles inside the volume, loses energy to absorption, and exits somewhere else entirely. The technical description on the subsurface scattering entry at Wikipedia frames it as a volumetric transport problem rather than a surface one, which is exactly why it costs more to compute.
Two properties control the result. Scattering distance sets how far light travels before it leaves, and it is measured in real units. Scattering colour controls which wavelengths survive that journey, which is why thin marble goes warm and orange rather than staying grey.
📐 Technical Note
Scattering radius is a physical distance, not a style slider. Marble sits around 1 to 3 mm, alabaster around 5 to 10 mm, and thin fabric under 1 mm. If your scene is modelled in metres but the shader expects millimetres, the effect either vanishes or floods the whole object. Check your unit scale before blaming the material.
Where Architects Actually See It
Backlit stone is the obvious case. Onyx and thin marble used as a light diffuser only work visually because light passes through, and a render that ignores this shows a dark slab in front of a bright box.
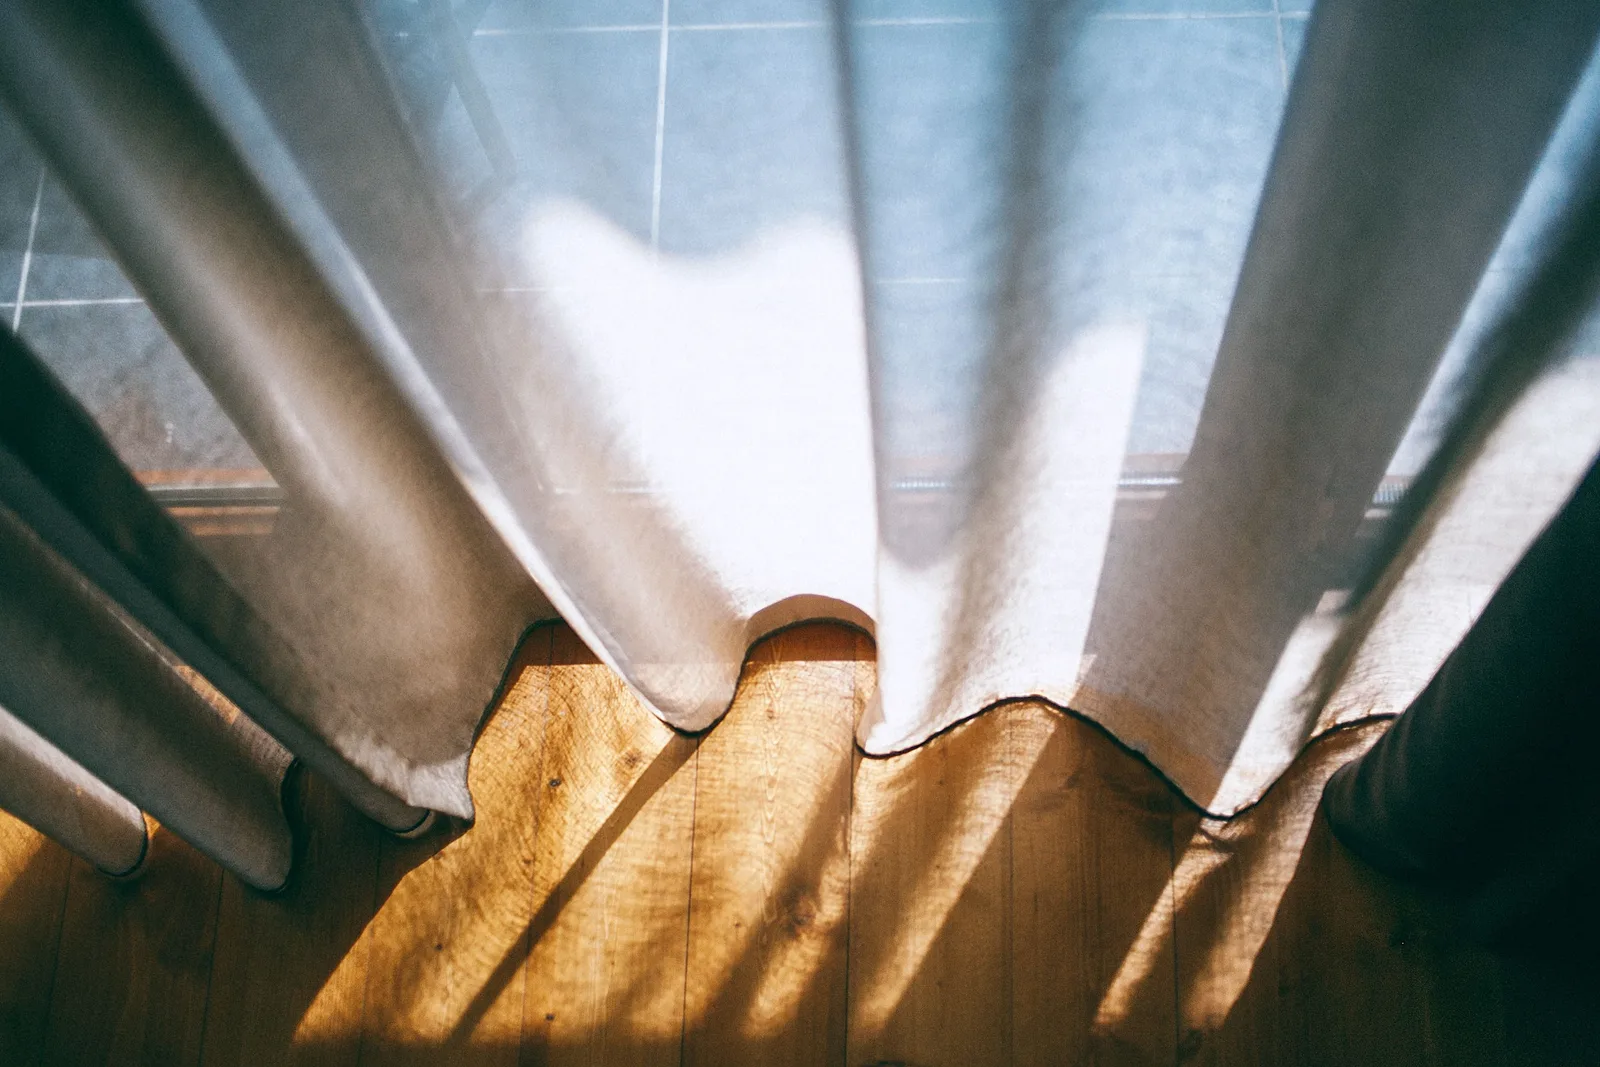
Curtains and sheer fabric are the second case, and probably the more common one. Every interior visual with daylight behind a curtain depends on scattering to look soft. Without it the fabric reads as painted cardboard, a failure mode covered in our guide to PBR materials for architectural rendering.
Then there is the long tail. Wax and candle detailing, resin partitions, polycarbonate cladding, thin timber veneer against a light source, water in a shallow pool, and any planting where the sun sits behind the leaves. Foliage is a particularly visible one, because leaves without scattering turn a render’s landscaping grey and lifeless.
💡 Pro Tip
Model backlit stone with real thickness. A single plane with a scattering shader has no volume for light to travel through, so the effect never appears no matter how high you push the radius. Give the panel its actual 20 mm and the glow arrives on its own.
How Render Engines Handle It
The two main approaches
Most production renderers offer a fast approximation and a slow accurate method. The approximation, usually some form of diffusion, assumes light enters and leaves close together and solves the result analytically. It is quick and looks correct on thick objects such as a stone bench.
The accurate method traces actual paths through the volume, sometimes called random walk. It handles thin geometry and strong backlighting properly, which is where diffusion falls apart, and it costs considerably more time. The Blender subsurface documentation lays out the tradeoff between the two clearly.

Engine by engine
In V-Ray the behaviour lives inside the standard material rather than a separate shader, with translucency options that the Chaos documentation for VRayMtl describes in detail. Corona exposes a similar set on its physical material. Blender‘s Cycles puts it on the Principled BSDF, which keeps everything in one node.
Real time engines cheat, and they cheat well. Screen space approximations originally developed for skin rendering, described in the NVIDIA GPU Gems chapter on realistic real time skin, still underpin what Twinmotion and Enscape do with foliage and curtains today.
Why it costs so much
Every scattering event is another bounce to trace, and paths inside a dense material can bounce dozens of times before escaping. That multiplies sample counts, which is why a scene that renders in ten minutes without translucent materials can take an hour with them. The theory behind the sampling cost is set out in the open textbook at pbrt.org.
⚠️ Common Mistake to Avoid
Applying scattering to every stone surface in the scene is the most expensive mistake in this area. Floor slabs, wall cladding and worktops are thick and lit from the front, so the effect contributes nothing visible while doubling render time. Reserve it for surfaces with light behind them.
Practical Settings That Work
Start with the radius in real units and leave it there. If marble looks wrong at 2 mm, the problem is almost never the radius, it is the lighting setup behind the panel or the thickness of the geometry.
Set the scattering colour warmer than the surface colour. Light that survives a trip through stone or skin has lost its blue end, so a warm interior tint against a neutral surface reads correctly. A cool scattering colour looks immediately synthetic.
Keep the light source close to the back face. Backlit stone needs a strong even source at short distance, and a single distant lamp produces a hot spot instead of a glow. The setup logic is the same one used for cove lighting in our architectural rendering lighting guide.
Expect noise and plan for it. Translucent materials are among the noisiest things in a render, and pushing samples alone is the slow answer. Denoising handles the rest, a workflow covered in our breakdown of render denoising.
Reading a Scattering Material Correctly
Three inputs decide what you see, and they interact. Radius controls distance, colour controls which wavelengths survive, and the balance between scattering and diffuse controls how much of the surface behaviour comes from inside the material at all.
A useful test is to render a single sphere of the material against a bright backlight before touching the scene. If the sphere does not glow at its silhouette, no amount of scene lighting will save the panel later. This isolates the material from every other variable in one quick pass.
Marble and onyx
Stone needs a short radius, a warm amber scattering colour, and enough diffuse to keep the veining readable. Push the radius too far and the veins wash out into an even glow, which looks like backlit plastic rather than stone. Real onyx keeps its pattern visible even when lit from behind.
Fabric and sheers
Curtains work at a very small radius, often under a millimetre, because the material is thin. The bigger factor is geometry. A curtain modelled as a flat plane will never catch light the way a folded one does, and folds cost nothing to add.
Foliage
Leaves are the highest return use of translucency in exterior work. A tree canopy with front lit leaves reads as a grey mass. The same canopy with light coming through individual leaves separates into depth immediately, which does more for an exterior visual than another two hours of grading. This pairs directly with the sun angle decisions covered in our night render techniques guide, where the same principle runs in reverse.
Checking Your Result Against Reality
Photographs are the only honest reference. Pull two images of the material you specified, one lit from the front and one lit from behind, and compare them against your render at the same angles. Most scattering errors become obvious within seconds under this test.
Pay attention to edge behaviour rather than the centre of the surface. Translucency shows itself strongest where material gets thin, which means silhouettes, chamfers and the edges of a panel. A render that glows uniformly across a flat face is almost always set too high.
When to Skip It Entirely
Massing studies, planning views and daylight diagrams gain nothing from accurate translucency. Anything at urban scale, anything in clay render, and anything where the camera never sees a backlit surface can drop it without a visible penalty.
AI based rendering sits in a different category again. Image models produce the visual result of scattering because they learned it from photographs, without simulating anything, which is why a backlit curtain from an AI render often looks convincing straight away. The tradeoff between simulated and learned material behaviour runs through our comparison of AI renders and professional 3D work.
✅ Key Takeaways
- Subsurface scattering models light travelling through a material rather than off it, which is what makes marble, fabric and foliage read correctly.
- Scattering radius is a real physical distance, so unit scale errors are the most common cause of a broken result.
- Geometry needs actual thickness, since a single flat plane gives light nowhere to travel.
- Apply it only to backlit surfaces, because front lit thick materials show no benefit and cost heavily in render time.
- Expect noise, and treat denoising as part of the workflow rather than an afterthought.
Translucency is one of the few material properties where a physically correct setting also happens to be the fastest route to a believable image. Measure the panel, use the real number, and put the light where the design puts it.