

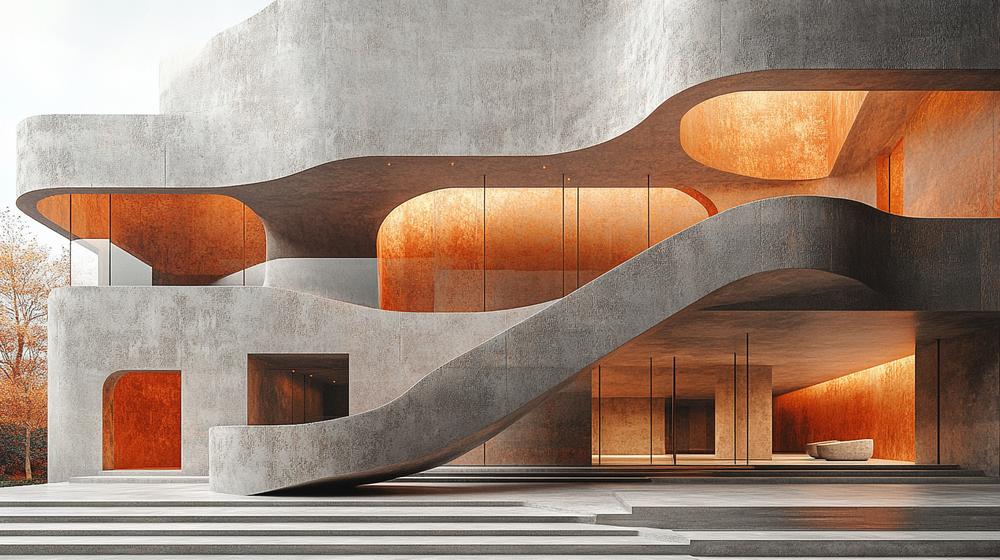
A great architectural render combines realistic lighting, accurate materials, thoughtful composition, environmental context, correct scale, refined post-processing, and visual storytelling. When all seven elements work together, the result is an image that feels like a photograph of a building that hasn’t been built yet.
You’ve probably seen renders that look stunning and others that feel off, even if you can’t immediately explain why. The difference almost never comes down to software choice or hardware specs. It comes down to how well the artist handles a set of core visual principles that apply across every rendering engine, from V-Ray and Corona to real-time tools like D5 Render and Lumion. Whether you produce renders manually, use AI-powered architectural rendering tools like ArchFine, or combine both approaches, understanding these fundamentals will sharpen your eye and raise your output quality.
According to the State of Architectural Visualization 2024-2025 report by Chaos and Architizer, still images remain the most valued visualization format among architects and their clients. That means every single frame needs to work hard. Below are the seven elements that separate forgettable renders from the ones that win projects.
1. Realistic Lighting and Shadows
Lighting is the single most influential factor in any architectural render. It determines mood, depth perception, material appearance, and spatial hierarchy. A poorly lit scene can destroy hours of modeling work, while well-executed lighting can make even a simple scene feel photographic.
Start by identifying every light source in the scene. For exterior renders, this means the sun’s position, time of day, sky conditions, and any reflected light bouncing off surrounding surfaces. For interiors, you need to consider natural light through windows alongside artificial fixtures. The color temperature of each source matters too. A warm tungsten lamp at 2700K creates a very different mood than cool daylight at 6500K, and mixing them carelessly can produce an unrealistic color balance.
Shadows deserve equal attention. Hard, sharp shadows suggest direct sunlight on a clear day. Soft, diffused shadows indicate overcast conditions or large area lights. Matching shadow quality to the implied lighting scenario is essential for believability. One of the quickest giveaways of an amateur render is harsh, unrealistic shadows that don’t match the environment’s implied weather and time of day.
💡 Pro Tip
Study architectural photography before adjusting your lighting setup. Professional photographers like Hufton+Crow and Iwan Baan consistently shoot during golden hour or in soft overcast conditions for a reason. Mimicking real photographic lighting scenarios in your 3D scene creates a subconscious sense of authenticity that viewers pick up on, even if they can’t articulate why.
Global illumination algorithms handle light bouncing between surfaces, and they play a huge role in rendering realism. Light in the real world doesn’t just hit a surface and stop. It bounces multiple times, picking up color from the surfaces it touches. A red brick wall next to a white sidewalk will subtly tint the sidewalk with warm reddish tones. Getting this indirect illumination right adds an enormous amount of depth and realism. The Chaos architecture gallery showcases how professionals use global illumination to achieve convincing results across different project types.
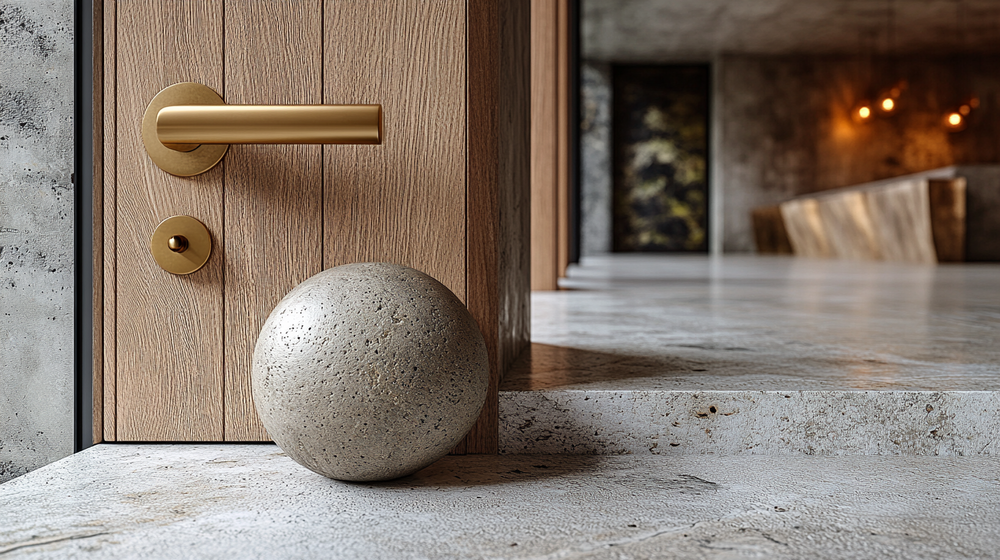
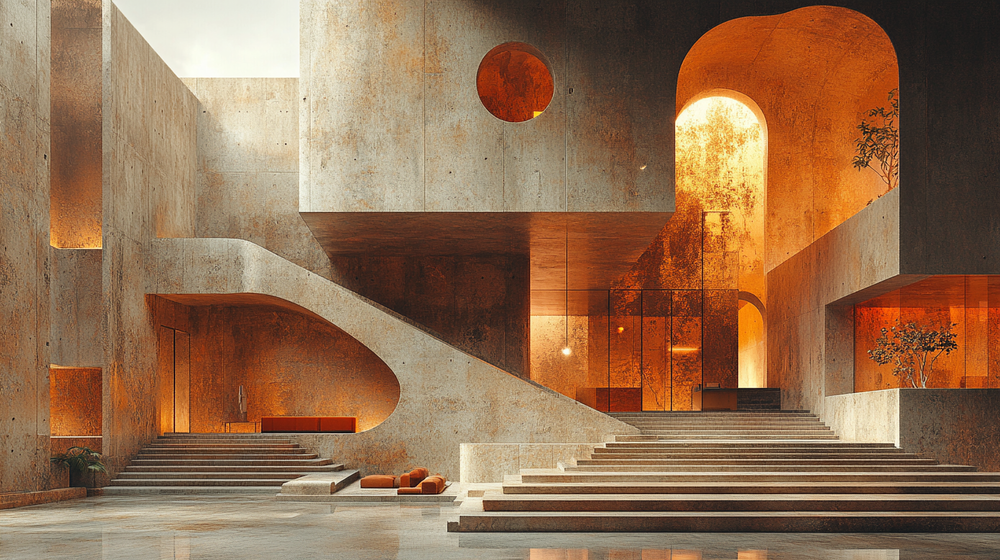
2. High-Quality Materials and Textures
Materials are what give a 3D model its visual identity. Concrete, glass, wood, metal, fabric, and stone all behave differently under light. Each has unique reflective properties, surface roughness, color variation, and transparency characteristics. Rendering software simulates these properties through Physically Based Rendering (PBR) material systems, which model how light interacts with surfaces according to real physics.
High-resolution texture maps are the starting point, but resolution alone isn’t enough. You also need proper bump maps or normal maps to simulate surface relief, roughness maps to control how sharp or blurred reflections appear, and in some cases, displacement maps to add actual geometric detail. A polished marble floor should show crisp reflections with subtle veining and occasional imperfections. A weathered wood surface needs grain variation, slight color shifts, and minor surface damage.
The biggest mistake in material work is making everything too clean and perfect. Real-world surfaces have fingerprints, dust, slight scratches, and uneven wear patterns. Adding these imperfections strategically prevents the sterile “CG look” that plagues many renders. However, moderation is key. Overdoing dirt and damage can make a new building look neglected rather than realistic.
⚠️ Common Mistake to Avoid
Using generic material presets without customization is one of the most common rendering mistakes. Default wood or concrete materials from a library rarely match real-world samples. Always adjust reflectivity, roughness, and color values by referencing actual material photographs. A 30-second comparison with a real-world photo can save you from a render that feels artificial.
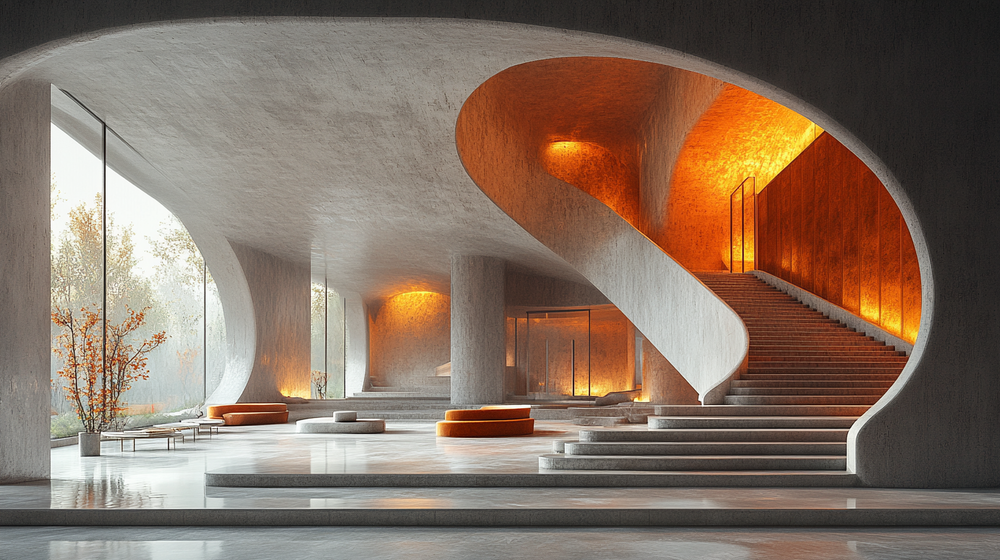
3. Thoughtful Composition and Camera Angles
Composition is what separates a render from a screenshot. It’s the deliberate arrangement of visual elements to guide the viewer’s eye, create visual hierarchy, and communicate the design’s intent. The same 3D scene can produce a forgettable image or a striking one depending entirely on where the virtual camera is placed and how it’s configured.
Professional architectural photographers use specific techniques that render artists should study closely. The rule of thirds places key architectural elements at intersection points of an imaginary 3×3 grid. Leading lines, formed by walls, corridors, or landscape features, draw the viewer’s eye toward the focal point. Framing elements like doorways, trees, or overhangs create depth and context around the main subject.
Field of view (FOV) settings deserve careful attention. Interior scenes typically use wider angles between 18mm and 35mm equivalent focal lengths to capture spatial volume without extreme distortion. Exterior shots often work well at 24mm to 50mm, depending on the building’s scale and the desired perspective compression. Using the wrong FOV for a given scene type can undermine all other visual quality in the render.
Two-point perspective, where vertical lines remain perfectly vertical, is the standard for most architectural imagery. It mirrors how professional photographers correct for lens distortion and produces clean, professional-looking results. Dramatic three-point perspectives have their place in certain hero shots, but they should be used intentionally rather than by accident. For a practical walkthrough of camera composition in architectural rendering, the Chaos blog’s guide on realistic renderings offers step-by-step advice with visual examples.
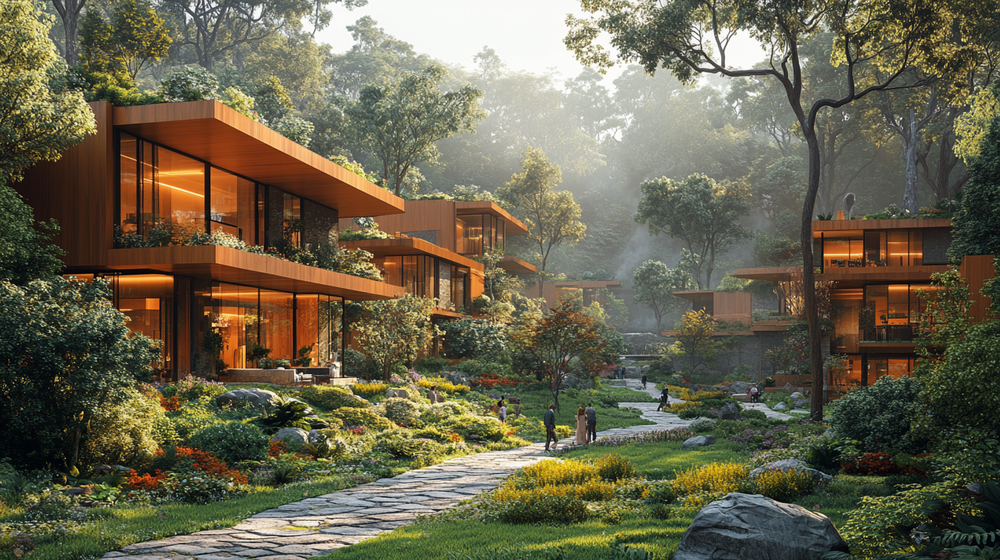
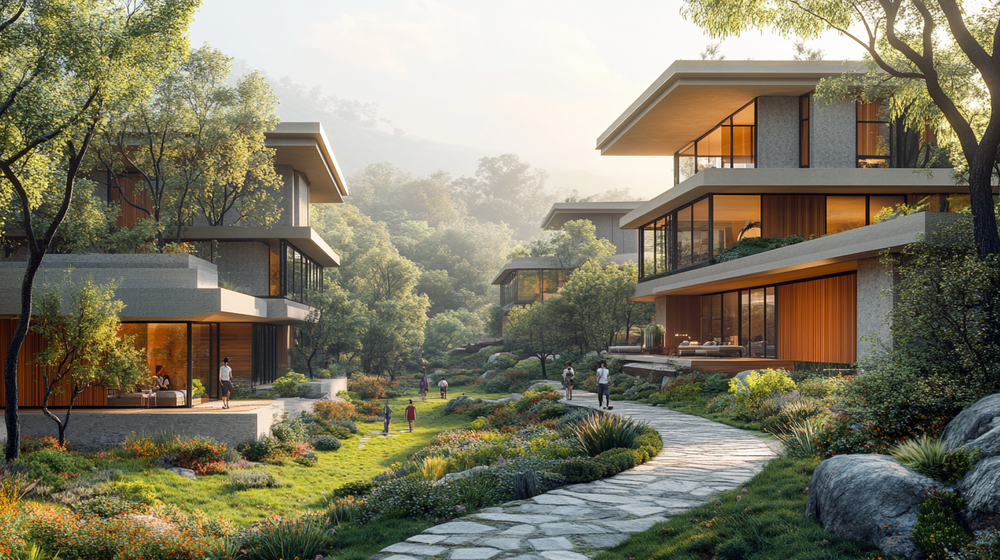
4. Environmental Context and Surroundings
A building doesn’t exist in isolation, and neither should a render. Environmental context grounds the architecture in reality. It includes the surrounding landscape, neighboring structures, street-level elements, sky conditions, and seasonal indicators. A residential project needs appropriate vegetation, garden elements, and a believable streetscape. A commercial tower requires an urban backdrop with cars, pedestrians, and neighboring buildings at the correct scale. Award-winning projects featured on Dezeen and ArchDaily consistently demonstrate how environmental context elevates the impact of architectural visualization.
Vegetation is often the element that makes or breaks environmental realism. Flat, billboard-style trees placed uniformly look synthetic. Varied species, mixed heights, and natural clustering patterns create a much more convincing landscape. Ground-level details like grass texture variation, fallen leaves, gravel, and pavement joints add another layer of believability.
🏗️ Real-World Example
Bjarke Ingels Group’s CopenHill (Copenhagen, 2019): The renders produced for this waste-to-energy plant with a rooftop ski slope gained massive attention partly because they showed the building within its actual harbor context, with smoke stacks, water, and surrounding industrial infrastructure. The environmental storytelling made the bold design concept feel grounded and feasible, helping secure public support for a project that might otherwise have seemed impractical.
Sky conditions should match the lighting setup exactly. A dramatic sunset sky paired with flat, even shadows looks immediately wrong. Cloud formations, atmospheric haze, and the subtle gradient of a sky from horizon to zenith all contribute to environmental believability. Many rendering professionals composite photographed skies rather than relying on procedural ones, achieving more natural variation.
Why Does Composition Matter More Than Resolution?
Resolution and pixel count are technical specifications, not quality indicators. A 10,000-pixel-wide render with poor composition, flat lighting, and generic materials will always lose to a well-composed 4K image that nails the fundamentals. This is why the seven elements discussed here focus on artistic and technical principles rather than hardware output. Spending time on composition, lighting, and material refinement produces far better results than simply rendering at higher resolutions or longer compute times.
The same principle applies to the growing field of AI-powered rendering. Tools like ArchFine can transform architectural sketches into polished visualizations in seconds, but the quality of the input, particularly the design concept and spatial thinking behind it, directly impacts the output. Even with AI acceleration, understanding these seven core elements helps you evaluate, guide, and refine the results.
5. Accurate Scale and Proportions
Scale errors are one of the fastest ways to destroy a render’s credibility. Oversized furniture, unrealistically tall door handles, incorrectly proportioned human figures, or trees that dwarf a five-story building immediately signal amateur work. The human brain is extremely sensitive to scale relationships, even when viewers can’t consciously identify the error.
Modeling in real-world units from the very beginning is the simplest preventive measure. If a standard door is 2.1 meters tall and 0.9 meters wide, it should be exactly those dimensions in the model. Furniture, fixtures, and human figures should all match manufacturer specifications or anthropometric standards. When importing assets from external libraries, always verify their scale against the scene before rendering. Tools like SketchUp, Revit, and Blender all support real-world measurement systems that prevent these errors from the modeling stage.
Human figures serve a dual purpose in architectural renders. They establish scale reference and inject life into the scene. But poorly proportioned or awkwardly posed figures do more harm than good. 3D scanned people assets at the correct height (average adult around 170-175 cm) positioned naturally within the space, walking, sitting, or interacting with the architecture, add significant realism.
📐 Technical Note
Standard architectural proportions to verify in every render: residential ceiling height is typically 2.4-2.7m, commercial spaces range from 3.0-4.5m, a standard single door is 2.1m x 0.9m, dining table height is 75cm, and seat height for a standard chair is 45cm. These dimensions come from international building standards (ISO 3880, EN 81-70) and ergonomic guidelines. Even minor deviations from these references can create an uncanny feeling in the final image.
6. Post-Processing and Color Grading
Post-processing is the final refinement stage where a good render becomes a great one. Just as professional photographers rarely publish images straight from the camera, rendering professionals use tools like Adobe Photoshop, Affinity Photo, or DaVinci Resolve to fine-tune their output. The goal is enhancement, not transformation. Overprocessed renders with extreme contrast, oversaturated colors, or heavy vignettes look artificial and undermine the photorealism achieved in previous steps.
Color grading establishes the overall tonal mood. A warm, slightly desaturated palette works well for residential projects aiming for a cozy, lived-in feel. Cool, high-contrast grading suits modern commercial spaces. The key is consistency. Every element in the scene should share the same color treatment, and the grading should complement, not fight, the lighting conditions established during rendering.
Useful post-processing adjustments include slight exposure correction, contrast curve refinement, chromatic aberration for lens realism, subtle bloom on bright light sources, and depth-of-field blur to mimic real camera optics. Render elements like ambient occlusion passes, reflection passes, and depth channels give precise control over individual aspects of the image during compositing.
💡 Pro Tip
Export separate render elements (diffuse, reflection, ambient occlusion, Z-depth) alongside your beauty pass. Compositing these layers in Photoshop or Nuke gives you far more control than trying to fix issues in the raw render. Experienced visualization artists spend roughly 20-30% of their total project time in post-production, and that time investment consistently shows in the final quality.
7. Visual Storytelling and Atmosphere
The most technically flawless render can still feel flat if it lacks a narrative. Visual storytelling is what transforms a 3D image from a documentation tool into something that connects emotionally with viewers. It’s the difference between showing a room and showing how it feels to be in that room.
Atmosphere encompasses elements like time of day, weather conditions, human activity, and the subtle “life” cues scattered throughout a scene. A morning kitchen render with steam rising from a coffee cup, soft sunlight streaming through curtains, and a newspaper on the counter tells a story about daily life in the space. An evening exterior with warm interior light spilling through windows, a rain-dampened sidewalk reflecting ambient light, and a couple walking toward the entrance creates emotional resonance.
These details take relatively little effort to add but dramatically increase the perceived quality and engagement of a render. Clients respond strongly to renders that help them imagine living or working in the space, not just seeing what it looks like from outside.
📌 Did You Know?
According to the 2024-2025 State of Architectural Visualization report by Chaos and Architizer, 85% of architects regularly face client requests for revisions on their renderings. Most revision requests relate to atmosphere and mood rather than structural accuracy, highlighting how much clients value the storytelling and emotional qualities of a render over pure technical precision.
Strategic use of depth also enhances atmosphere. Foreground elements like plants, furniture edges, or structural columns create a sense of the viewer being inside the scene rather than observing it from outside. Middle-ground focus on the primary architecture communicates the design intent. Background elements provide context without competing for attention. This layered depth mimics how the human eye perceives real spaces.
How AI Is Changing the Rendering Workflow
AI-powered tools are reshaping how architects approach visualization without replacing the need to understand these core principles. According to the 2024-2025 State of Architectural Visualization report by Chaos and Architizer, 44% of architects already use AI to generate concept images and early design ideas, while 35% use it to create quick design variations. The adoption rate is climbing fast, with 74% of firms saying they plan to increase AI usage over the next 12 months.
AI rendering platforms like ArchFine allow architects to transform sketches into styled visualizations rapidly. These tools handle much of the technical heavy lifting, applying realistic lighting models, material simulation, and environmental context automatically. For concept-phase work and quick client presentations, this speed advantage is significant.
But AI tools perform best when the user understands what good rendering looks like. Knowing the seven elements outlined above helps you evaluate AI output critically, provide better input guidance, and identify where manual refinement can push the result further. The architects getting the most from AI rendering are those who combine it with a solid foundation in visualization fundamentals.
🔢 Quick Numbers
- The global 3D rendering market was valued at $4.85 billion in 2025 and is projected to reach $19.82 billion by 2033 (Grand View Research, 2025)
- 46% of architecture firms already use AI at some point in their visualization workflow (State of AI in Architecture report by Chaos and Architizer, 2024)
- Professional rendering reduces design revisions by up to 40% and accelerates project approval timelines (Rendimension, 2025)
Bringing It All Together
These seven elements don’t operate independently. They form an interconnected system where weakness in one area diminishes the impact of strength in others. Perfect materials under bad lighting still look wrong. Brilliant composition with incorrect scale still feels off. Great atmosphere with poor textures still falls flat.
The path to producing consistently excellent renders, whether manually or with AI-powered tools, starts with developing your eye for each element individually and then learning how they work together. Study professional architectural photography on ArchDaily, analyze award-winning visualizations on platforms like CGarchitect, browse featured projects on Architectural Digest, and pay attention to how the best work in the field balances technical precision with artistic sensitivity.
For architects looking to accelerate their visualization output without sacrificing quality, AI-powered platforms offer a practical middle ground. ArchFine applies many of these rendering principles automatically, letting you focus on design decisions rather than shader settings. But regardless of your tools, a solid understanding of what makes a render great will always be your most valuable asset.
✅ Key Takeaways
- Lighting is the single most impactful element. Study real-world photography before setting up virtual lights.
- Materials need PBR accuracy and subtle imperfections to avoid the sterile CG look.
- Composition and camera settings follow the same rules as professional architectural photography.
- Environmental context grounds the building in reality with vegetation, surroundings, and sky conditions.
- Scale errors are immediately noticeable. Model in real-world units and verify every imported asset.
- Post-processing should enhance, not transform. Spend 20-30% of project time on final refinement.
- Storytelling and atmosphere turn technical renders into images that connect emotionally with viewers.


